Dev Log 03: StateTree Isn't Just for AI
StateTree is a hierarchical state machine introduced in Unreal Engine 5.

The base StateTree plugin provides a general-purpose hierarchical state machine, but it does not provide any schema or even a processor to actually execute a StateTree.
Unreal Engine comes with a handful of plugins with their own schemas and processors.
| Plugin | Purpose | Processor |
|---|---|---|
GameplayStateTree |
StateTree for actors. |
StateTreeComponent actor component |
GameplayInteractions |
StateTree for smart objects. |
UAITask_UseGameplayInteraction gameplay task |
MassAI |
StateTree for Mass entities. | Various Mass processors |
Unreal Engine uses StateTree exclusively for AI, and even placed the asset type under the Artificial Intelligence category.
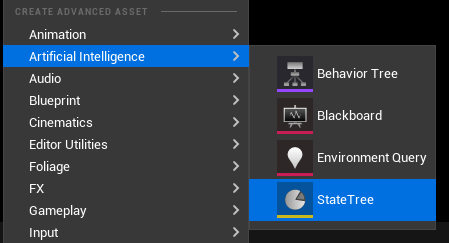
I’m here to let you know that it’s not just for AI!
Once again, StateTree is a general purpose state machine built into Unreal Engine with its own editor. You don’t need a third-party plugin or develop your own state machine. In fact, Unreal Engine 5.4 has made it even more useful with linked assets and themes.
Why do I need a state machine?
First, let’s take a look at my game’s frontend.
The player goes through this sequence when launching my game — and no, I don’t expect you to read it all.
I want to bring my players into the game as soon as possible. Launching the game for the first time opens accessibility settings. On this screen, players may switch to graphics and audio settings if they wish.
Then it proceeds to the character creation screen. Next, the game creates a new save and enters the co-op lobby with the save slot name as a URL parameter.
If it’s not the first time, then it will prompt the player if they want to load their most recent save. Declining will bring the player to the main menu. This means for most players, they will never see the main menu at all!
But widgets have to have references to other widgets. The main menu widget has to be responsible for showing the settings and save selection menus. Some widgets have to check whether a save slot exists and then create a different widget based on this information. I could go on and on…
Without a state machine, this produces Blueprint spaghetti that is fragile, hard to maintain, and prone to bugs!
Using StateTree for the frontend
Here’s what my frontend looks as a StateTree. Each step in the flowchart above is implemented as a self-contained discrete state with tasks, conditions, and transitions.
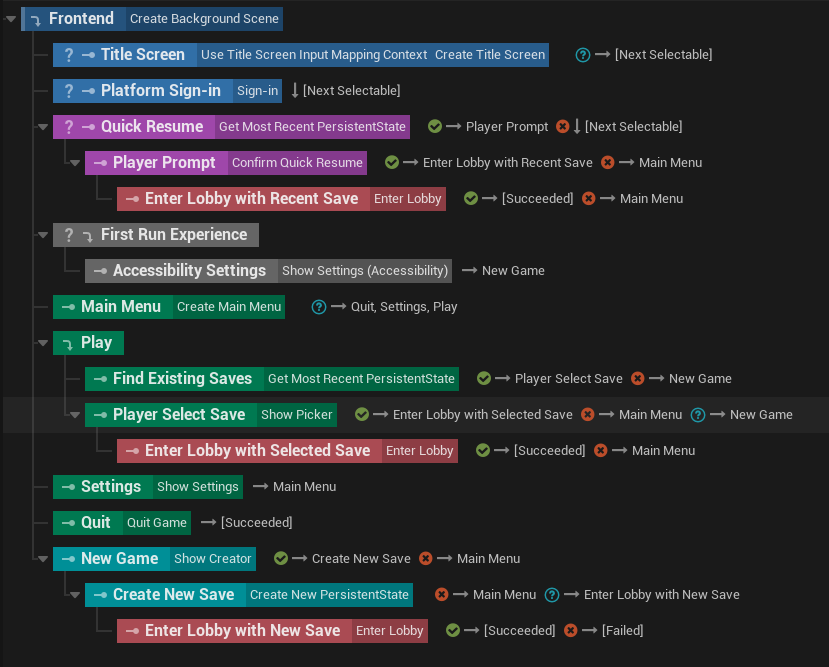
The StateTree Component schema provides an actor as context data. Since my use case involves input and widgets, I set the actor type to PlayerController. The startup level in my game uses a special PlayerController actor that has a StateTree Component. This makes the StateTree immediately begin executing when the game loads.
The funny thing is I actually spent weeks building a UMG StateTree with its own custom schema and a set of tasks. Unfortunately, what I ended up with is more or less the same thing as the built-in GameplayStateTree plugin. The only real difference between my plugin and GameplayStateTree is that the processor is implemented as a subsystem rather than as an actor component.
I even wrote a whole article about this, but it doesn’t feel right to publish it when I realized the better solution is to just use GameplayStateTree.
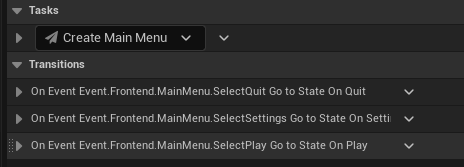
Most tasks complete in a success or failed state. For example, a player wanting to back out of character creation causes the state to fail. This will trigger a transition to bring the player back to the main menu.
As for the main menu, there’s no success or failure condition. Instead, clicking on a menu button raises a StateTree event. A transition is set up for each event to enter another state that actually does something. The main menu widget only reports player intent, and leaves it to the StateTree to decide what to do next.
Widgets are clearly not tasks, so how did I raise a StateTree event? My solution is to create a base widget class with an event dispatcher that top-level widgets must subclass from.
Tasks bind to this event dispatcher after creating the widget. To simplify this even further, I created a base task class called CreateWidgetAsync that takes in a soft class reference as a parameter. By subclassing from this task, I don’t need to reimplement the same logic over and over.
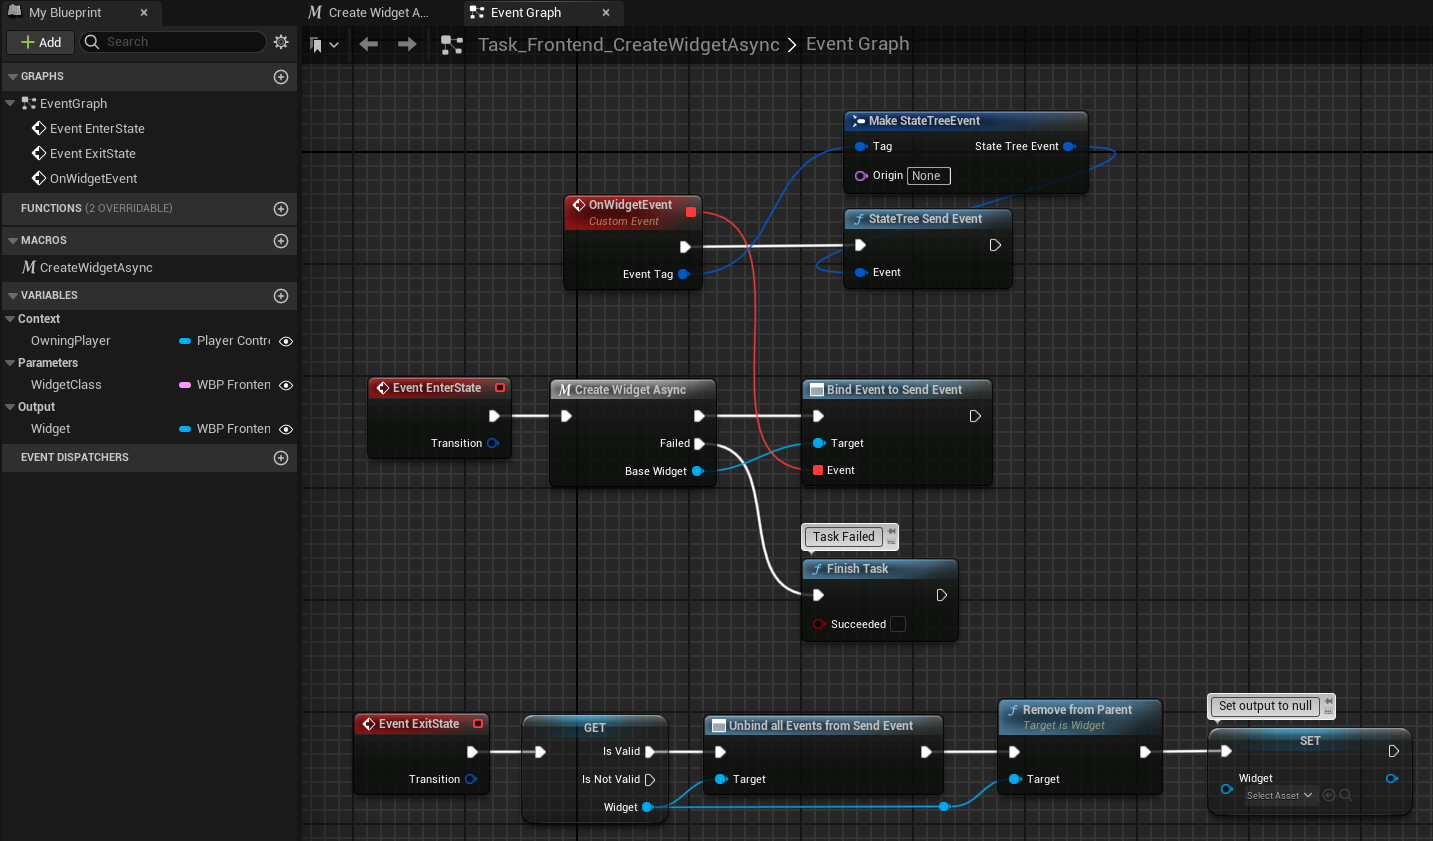
Notably, it does not call Finish Task unless there was an error. This is how a widget remains visible indefinitely.
By the way, always use soft references in task parameters! Avoid hard references to any blueprint widget (other than the base class). If you’re not careful, the StateTree’s memory footprint will skyrocket.
StateTree tips & tricks
Here are some things about StateTree I wish I knew about earlier.
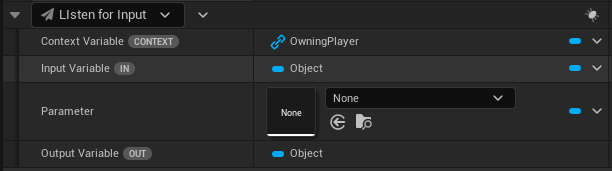
Rename tasks
Did you know you could rename tasks? I didn’t for an embarassingly long time. This really helps with identifying which widget to target in a property binding.
Just click on the task name to edit it.


This also works for conditions and evaluators.
Organize blueprint nodes
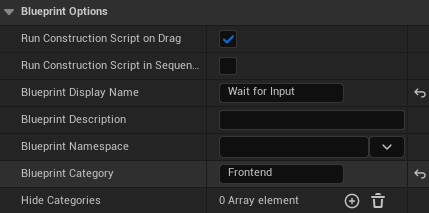
In each one of your blueprint nodes (tasks, conditions, or evaluators), be sure to go to Class Settings and override the display name and category. This will make it easier to find your nodes in the picker.
Parameter types
The Category sets the type of a parameter.
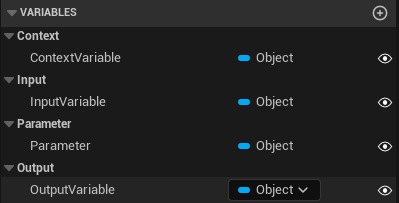
There are 3 special types of parameters:
| Category | Behavior |
|---|---|
Context |
A value is required. Automatically links to context data in the StateTree with the same type, but may be overridden with a binding. |
Input |
A value is required unless marked optional with meta=(Optional) in C++. This value can only be set with a binding. |
Output |
This value can only be bound to other properties. |
Parameters in all other categories appear normal.
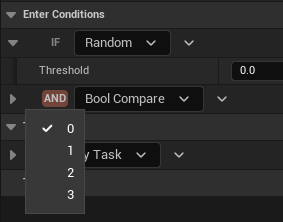
Condition operators and indentation
Adding more than one condition will reveal operators. Click on it to switch between AND/OR.
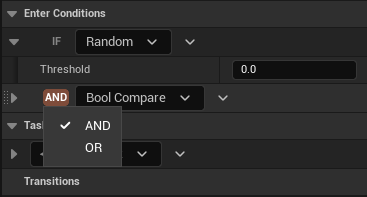
There is also an invisible button right before the operator button. Click on it to change the indentation of a condition. Operators apply to conditions within the same indentation.
Subtree transitions
The Tree Succeeded and Tree Failed transitions inside a subtree will surface to the linked state and no further. However, if a subtree was entered by a transition instead of a linked state, then these transitions will affect the whole StateTree.
Blueprint Latent Node Caveat
Be mindful when using certain latent nodes (e.g. Async Save Game). Calling Finish Task from these latent nodes will not trigger transitions. Consider raising a StateTree event instead.
Ending thoughts
I’m not claiming this is the best approach, but it does work pretty well. The biggest benefit of using StateTree is that I can see the entire flow within a single asset. So, yeah, I’m happy with what I have right now. :)